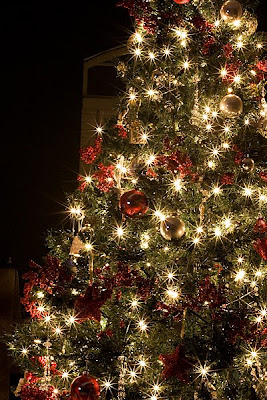
Look, our Elf on the Shelf finally arrived from the North Pole. Emily named him Gabriel, and he spent today in the Christmas tree. I wonder where he will be tomorrow?!?!
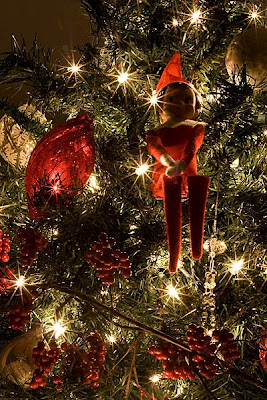
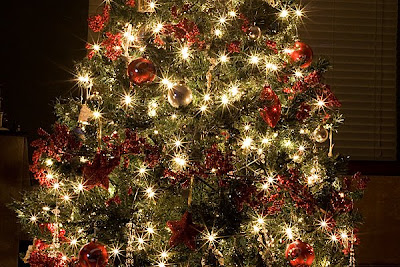
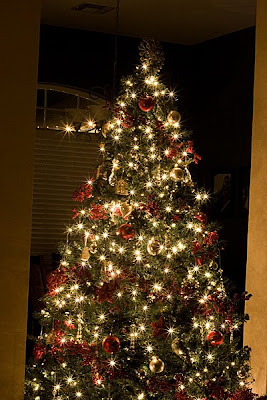
If you already know how to set manual settings, it's simple. Use a tripod, and use the following settings: F22, 6 second shutter speed, ISO 400, and tungsten white balance. Use the self-timer or a remote to take your picture.
If you don't know how to set manual settings, here's my DETAILED directions. I am describing the way I change settings on my camera, so yours may be a bit different. You may need to look at your manual for how to change settings.
First, gather your camera and a tripod. Don't have a tripod? Put your camera on a solid surface such as a table or shelf. I used to stack my ottoman storage cubes vertically in lieu of a tripod, but for these, I had hubby borrow one from work for me to play with.
Mount your camera on the tripod or set it on a solid surface. Turn the camera on!
Now, turn your dial to "M." You can do it--don't be scared!
Somewhere on the back of your camera, there should be a button that says "WB." On my Canon Rebel XTi, it is the down arrow button. Press this button, and arrow over until "tungsten light" is highlighted. Select it by pressing the select button which is the middle of the 4 arrow buttons on my camera.
Also on the back of the camera is a button called ISO. On mine, it's the up arrow. Press this button and and arrow over until "400" is highlighted. Select it by pressing your select button.
Now you will change the aperture to F22. This is how I do it on my camera. Right behind the shutter release (button that you use to take a picture), there is a little wheel you can turn. Turn it and hear it click-click-click. On the back of the camera, there is a button that says "AV." Now you will do 3 things at the same time:
Press and hold the "AV" button
Turn the wheel
Watch your display--You should see it changing F5.6, F6.3, F7.1, . . . , keep turning the wheel until you see F22 displayed. If the numbers are getting smaller, turn the wheel the opposite direction :D Congratulations--you just changed your aperture! Aren't you excited???
***Side Note***The first time I tried changing my aperture, I was trying to turn the wrong "wheel." One wheel on the top of your camera is the one you probably use all the time. It's the one with P, AV, M, a green square, and lots of pictures. You use this to select different modes to take a picture. This is NOT the wheel that you use to change aperture and shutter speed. I wish someone had told me that because I kept clicking that thing over and over, wondering why my shutter speed wasn't changing.
Now I will teach you how to change your shutter speed. On my camera, if you turn the wheel without pressing AV or any other button, it changes the shutter speed. You should see the numbers decreasing 1/30 to 1/25 to 1/20 to 1/15 and so on. These numbers mean 1/30 of a second, 1/25 of a second, etc. After you pass 1/5 and 1/4, the numbers will start to look different. You will see 0"3, 0"4, 0"5, etc. then 1", 2", and so on. Choose 6" (6 seconds). Your camera is going to take 6 seconds to take the picture. How cool is that? This is why you need a tripod. Unless you can hold your camera perfectly still for 6 seconds, your photo will be blurry.
Now, if you have a remote, you will want to use it because you don't want to shake your camera pressing the shutter release. This will cause blur. I don't have a remote, so I put my camera on the timer. Here's how I do it on mine: I press the button under AV. This button does not have any words, but it has a little picture squares and a little picture of a clock. Scroll over to "self timer" which should have a picture of a clock, and use your select button to select it.
Now your camera is ready. It's time to turn out all of the lights except the Christmas lights! Press the shutter release and wait while your camera counts down and then takes the picture. You can experiment with different shutter speeds. I tried some with 6, 8, and 10 seconds. To change the shutter speed, just click the wheel, remember?
***TROUBLESHOOTING: Since we all probably have different lenses and are standing at different distances away from our Christmas trees, my f22 aperture may be letting in more or less light than your f22 aperture. Since you know how to change the aperture now (hold AV button while turning the clicky-wheel), try using a lower number like f18 or f11 if your pictures are too dark at f22. That will let a little more light into the camera. But you need to keep the 6 second shutter speed if you want stars! Just try different apertures until you like the effect.
Here is my Christmas tree with f/1.8, and shutter speed 1/20. It's nice, but there are no stars.

And here is my tree with f22 and 6 second exposure.
Use your imagination and creativity! Think of your outside lights!!! It was too windy tonight for me to do this outside (the wind would cause the trees/lights to move which will make them blurry).
I would LOVE to see your pictures! If you have the capability of changing aperture and shutter speed, leave me a comment letting me know when you've posted yours. If you don't blog, post it on your facebook (MOM). The best part about taking these photos is that it needs to be done when it's dark, so your kids are sleeping, and you can concentrate without little ones around.
Do yourself a favor and try it. I know I was completely terrified the first time I tried messing with any settings on my camera. But it takes just a minute or two of changing settings, and the result will be a unique picture that you will treasure of Christmas 2008.
GO DO IT!!!!!!
***I am so thrilled that people are trying this! I've received questions via phone and email, so keep 'em coming. And my brother tried this on his camera which is not a DSLR (but still has some manual controls), and it worked. So if you have any camera that allows you to change some settings, go for it.
6 comments:
love the pics, I think that's why my house pictures had stars. I didn't have my ap up that much but I think it was about 11 or so. Then I had a pretty slow shutter speed. So that is probably why I had stars rather than the uv filter.
the tree looks great!
I made an attempt for those of us not fortunate enough to have a DSLR. It didn't turn out too bad I think. There was only one setting I was not able to duplicate. I could only go to f8.0. Check out our blog to see.
Hey Girl!
Thanks for sharing the love with all the camera setting info.
NEAT-O
I am planning on trying this out tonight and will post the pics on the blog soon!
Great Post Idea Melissa
EWWHHH, I think my post should be called..."camera challengED"
Mine are way too dark, you can see small bursts but not big ones like yours...show a sister some love and pray tell me what to do...
I'll email you my results, I'm too, ahem, embarrassed to post them!
To anyone, I'm happy to help! Email me or post a question here. Or send me your pic for analysis. You won't be bugging me--I need a distraction this week!
Very cool Melissa! I'll have to try that tomorrow!
Post a Comment